Pages

Friday, September 6, 2013

Healthy Almond Coconut Fudge

This is a fun, easy treat to make. Seriously, so easy! I made it a few weeks ago when I had a mad chocolate craving. Next time, I think I'll try substituting with peanut butter and sprinkling m&m's on top for the kids. That would be a great after school snack!

Healthy Coconut Almond Fudge (adapted from Creating Naturally)
1/2 c. virgin coconut oil, melted
1/2 c. roasted & salted almond butter
1/2 c. cocoa
1/4 c. agave (I used a bit less)
1/4 t. vanilla
3 T. roasted almonds
2 T. shredded coconut (I used unsweetened)
 
In a microwave safe bowl, combine coconut oil and almond butter. Microwave for a few seconds to soften. Stir in cocoa, agave, and vanilla.
 Pour into a lined 9x9" pan. Sprinkle with almonds and coconut. Refrigerate until firm.
 Once it has firmed up, cut into squares.
 Oh, it just melts in your mouth! Be sure to keep it in the fridge or it will get soft and gloopy. I guess that's not a bad thing if you want to eat it with a spoon, haha!
Enjoy!

Monday, August 12, 2013

Perfectly Soft Chocolate Chip Cookies

I have such fond memories of cookies. I remember coming home from school on rainy days and my mom always had cookies waiting for us. Chocolate chip were probably my favorite growing up. Who doesn't love chocolate chip cookies? They are such a comforting treat. So now as an adult, whenever I'm having an off day, I always want to make chocolate chip cookies to make me feel better. Trust me, this recipe will not disappoint. Also, it make a TON of cookies so ... it's bound to make you happy!


Perfectly Soft Chocolate Chip Cookies
(makes 8 dozen)

1 lb. salted butter, softened
2 & 1/2 c. packed brown sugar
1/2 c. granulated sugar
4 eggs
2 t. vanilla
5 & 1/2 c. flour
1 T. cornstarch
2 t. baking soda
1/2 t. salt
1 (12 oz.) bag mini chocolate chips
1 c. regular chocolate chips
1 (10 oz.) bag chocolate chunks*

*I didn't have enough chocolate chunks in only a 10 oz. bag. So I ended up making half without. You might notice in the photos that some have chunks, some don't. They were all delicious, but if you want enough to use on every cookie, I might suggest 2 bags.

In a stand mixer, combine butter and sugars. Mix on a medium-high speed for about 5 minutes.
 Add eggs, one at a time, mixing well between eggs. Then add vanilla.
 Remove bowl from mixer and add flour, cornstarch, baking soda, and salt.
 Mix by hand until almost all the flour mixture is incorporated.
 Stir in mini chips and regular chips. (Not the chunks.)
 Drop dough in 1" balls onto a parchment lined cookie sheet. Arrange 3-4 chocolate chunks on top of each cookie.
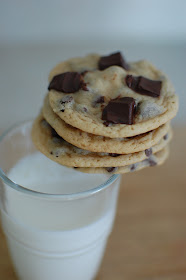
 Bake at 375 F for 6 minutes, NO LONGER! If they look way too underbaked, then you're right on the money. That's exactly what you're after! Let them cool on the cookie sheet for at least 5 minutes.
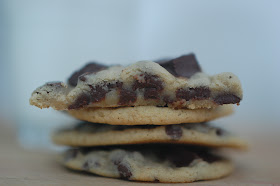
 They continue to set up as they cool.
 Look at that perfect, soft center. Just grand!

 I brought 4 dozen of these babies to a family event and they were the first to go. Everyone was raving about them!
These cookies freeze wonderfully. You could also freeze the cookie dough balls to have fresh baked cookies anytime. Enjoy!

Monday, July 29, 2013

Simple Basil Pesto

I've developed a real fondness for pesto. It brings such a fresh and rich flavor to so many dishes. Lucky for me, pesto is super simple to make.
 Fresh basil is pretty much the main ingredient in pesto and it can be a little pricey at the store. So in June I decided that I wanted to grow it. Now, I've tried to grow basil in the past and failed miserably. I have some strange desire to be able to grow a garden someday so year after year I keep on trying... Anyway, this year I bought a little basil plant, put it in a container on my porch, and I haven't killed it!!! I'm so proud.
 

Simple Basil Pesto (slightly adjusted from Blendtec)
2 c. loosely packed fresh basil leaves
1/3 c. olive oil
2 gloves garlic
1/4 c. pine nuts
1/4 c. parmesan cheese
1/4 t. salt
black pepper

Place all ingredients in a blender (magic bullet might work, too) and blend it up.
 And...tada! Fresh pesto.
 I'm totally obsessed with it right now. This is what I've been eating lately: steamed zucchini and/or yellow squash, melted cheese, diced tomatoes (seasoned with a little olive oil, garlic powder, oregano, salt and pepper), and a scoop of pesto on top. So dang good. Now I just need to grow some zucchini, yellow squash, and tomatoes.
Enjoy!

Monday, July 22, 2013

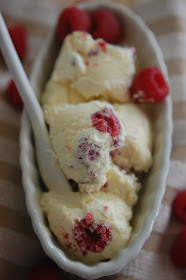
Frozen Raspberry Cream Custard

Ice cream is one of my favorite things in the world. Seriously, I have a weakness for ice cream. But frozen custard ... ah, now that's truly where the magic resides. The main difference between ice cream and frozen custard is that the latter contains egg yolks and must be cooked thoroughly before freezing. It's a little bit more work, but, oh, so worth it! This is one recipe that I am going to keep forever.

Frozen Raspberry Cream Custard
8 egg yolks
1 & 1/2 c. sugar
good pinch of salt
3 c. heavy whipping cream
1 & 1/2 c. milk (I used 2%)
1 t. vanilla
2 c. fresh or frozen raspberries
 
In a large mixing bowl, combine egg yolks, sugar and salt.
 In a saucepan, heat cream and milk over medium-high heat for about 10 minutes. Stir constantly.
 Slowly pour hot cream over egg yolk mixture, whisking as you go.

 Return mixture to saucepan and heat over medium-high heat until it reaches 170 degrees. Again, stir constantly.
 Remove from heat and stir in vanilla.
 Pour mixture into a clean bowl (metal or glass works best) and place the whole bowl in and ice bath. Stir until cool. {This step isn't absolutely necessary, but it does significantly speed up the cooling process.} After the ice bath, cover with plastic wrap and place in the fridge for 1-2 hours. {If you don't do an ice bath, refrigerate overnight.}
 Pour custard into an ice cream maker and freeze according to manufacturer's instructions. After custard is frozen, stir in raspberries by hand.
 Then serve it up.
 Pictures cannot capture how perfectly smooth this turns out. No ice crystals at all!


Now go make some ... now ... right now. Enjoy!

Tuesday, July 16, 2013

Loaded Pumpkin Cookies

Well, a few days ago I got my annual mid-summer pumpkin cookie craving. Seriously, every summer I want pumpkin cookies, without fail. I'm not complaining, in fact, I find it somewhat humorous. This time I decided to make a more ... exciting version of the original.

Loaded Pumpkin Cookies
1 c. (2 sticks) butter, softened
2 & 1/2 c. sugar
2 c. pumpkin
2 eggs
2 t. vanilla
4 & 1/2 c. whole white wheat flour
1 & 1/2 c. old fashioned oats
2 t. baking powder
2 t. baking soda
2 t. cinnamon
2 t. nutmeg
1 t. salt
1 (11 oz.) bag mini chocolate chips
1 c. cinnamon chips
1/2 c. butterscotch chips

Preheat oven to 350 F. In a large bowl, cream butter and sugar. Add pumpkin, eggs, and vanilla and mix until fluffy. Add flour, oats, baking powder, soda, cinnamon, nutmeg and salt. Mix well until it forms a dough. Fold in chips.
Drop spoonfuls of dough onto a greased (or parchment lined) cookie sheet.
 Bake at 350 F for 12-14 minutes.
Perfectly soft with a hearty, chewy texture and packed with chips. Just grand! 

 Enjoy!
Thursday, June 6, 2013

Chocolate Fudge Microwave Brownie

I keep seeing recipes for single-serve microwave desserts. They're everywhere! For the longest time I didn't get it. I thought, 'Why not just make a whole batch of something?' Well, I tried it...and I TOTALLY get it now! I can see myself making a hot brownie or cake every night. And with this recipe, I don't feel super guilty because it's pretty nutritious.
 

Chocolate Fudge Microwave Brownie - adapted from Lexie's Kitchen
makes 2 servings (vegan & gluten free)

1/4 c. oat flour
1/4 c. sugar (or dry sweetener of choice)
3 T. cocoa powder
2 T. coconut flour
1/4 t. baking powder
1/8 t. salt
2/3 c. soy milk (any other milk would probably work too)
2 T. coconut oil
2t. vanilla
1/4 t. liquid stevia extract

Combine dry ingredients in a mixing bowl.

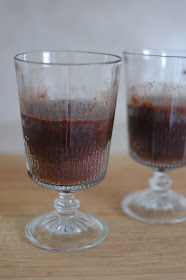
Combine milk and coconut oil in a microwave safe cup. Microwave for 30-60 seconds or until oil is melted. (I used the same spoon to measure the cocoa and coconut oil, hence the brown looking milk mixture...)
 Add milk mixture to dry ingredients along with vanilla and stevia. Mix well. (Batter will be thin.)
 Pour batter into 2 mugs or heavy duty glass cups.
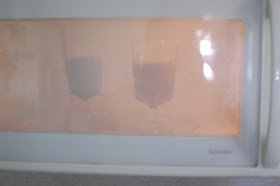
 Microwave for 3 minutes + 30 seconds.
 Let brownies cool for 5-10 minutes before digging in! Trust me, they will stay plenty hot for quite a while. Personally, I don't enjoy burning off my taste buds.
 Now you can dig in!
 These are seriously fudgy! Top it off with some ice cream or whipped cream = no words!
Enjoy!